Content-Aware Fill is an amazing tool, but Photoshop has an
even more effective tool to get the job done: the Remove Tool. This tool allows
us to simply draw over an area of our image and Photoshop will magically remove
the object. Now, before you think 'that's what Content-Aware Fill does' - hang
on. The two actually work in completely different ways.
While the Content-Aware Fill works by sampling the pixels
surrounding your selection, the Remove Tool uses machine learning (which is a
type of AI, or Artificial Intelligence) to analyze the image and determine how
best to not only remove the object, but to also fill the area with something
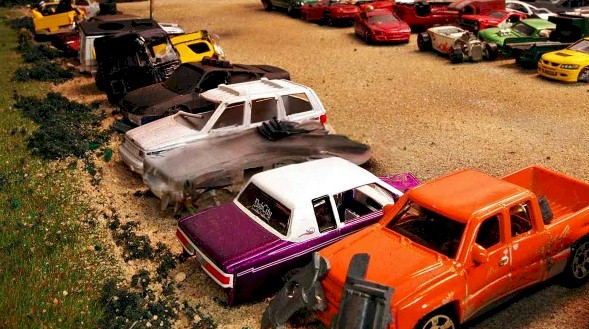
that makes sense for the image. While Content-Aware Fill works great on images
with consistent backgrounds (backgrounds that are similar throughout the entire
image), it doesn't work very well for complicated backgrounds, such as the cars
in the junkyard. However, the Remove Tool is specifically designed
to work with complex backgrounds, edges, and can even preserve the image's
perspective.
|
Quick side note here: WHAT IS AN IMAGE'S PERSPECTIVE?
Image perspective refers to the idea that some objects in an image are
closer to the viewer than others. Take a look at this image...

Along with being a clever image (get it? the paint is being poured on
her head and thus coloring her hair...harhar), we have 7 distinct
areas of identifiable distance, going from closest to farthest away
they are:
- Closest: The girl
- The vehicles
- The roadway
- The billboard with the paint can
- The building on the right
- The building on the left
- Farthest away: The sky
As humans viewing the image, we are able to make the distinction
between the different distances based on our experiences, the
content of the image, and the shape of the objects. For example, one
of the reasons we know the building on the left is the farthest
object away
from us is because, in the image, it is small and we know that
buildings (compared to people) are not small. For the building to be
small it must be far away.
So what does all this have to do with Photoshop? Well, when we edit
images with Photoshop, the software is generally unable to take any of this
into consideration. As far as Photoshop is concerned, there is no
girl, no vehicles, no road, and no buildings - only pixels. When you
make a change, Photoshop only worries about the colors in the image
and their relation to each other. It does not care about the actual subject of the image.
When we apply machine learning to the image, Photoshop is able to
identify that a person is in the foreground, as well as being able
to identify vehicles, roads, and buildings, among other things. Not
only that, but Photoshop recognizes that the girl is nearest to the
viewer, as well as the other 6 image perspective distances. Because
of this, when we make changes using the Remove Tool, Photoshop is
able to adjust things so that the sense of depth within in the image
is maintained. None of the other Photoshop tools we have covered can
do this, which makes the Remove Tool a very powerful tool.
|
We are going to use the Remove Tool on two different parts of the
Colosseum image so we can get a good look at what it is capable of doing.
-
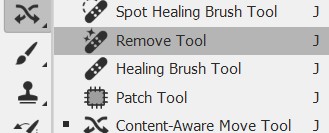
Right-click the
Content-Aware Move Tool and then click the
Remove Tool...
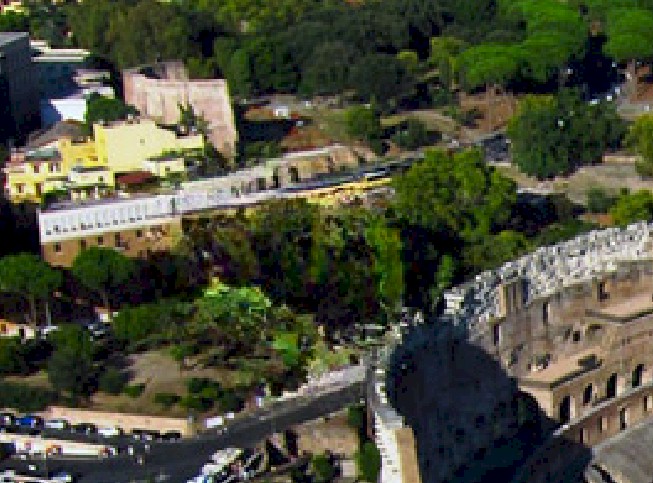
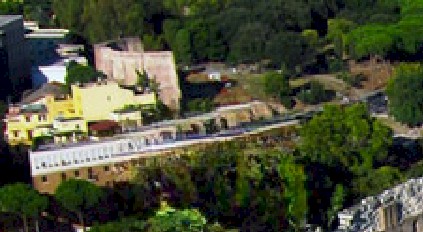
Scroll to the top left-hand corner of the image and locate the yellow
building indicated in the image below...
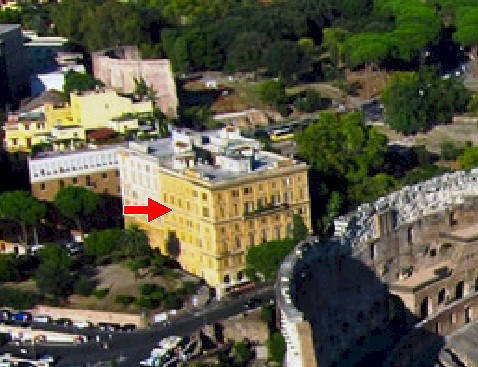
We are going to remove this entire building. Such a large, complicated object
would be difficult to remove using the tools we have used so far, but watch how
easy it is using the Remove Tool.
-
Set the Remove Tool options bar to match the image below......

To select the building, we can either draw around the border and when we
release the mouse button Photoshop will fill in our selection (if you try this,
be sure you end at the same spot that you began to create an enclosed area), or
you can simply draw over the building as if we were
coloring it with the Brush Tool.
-
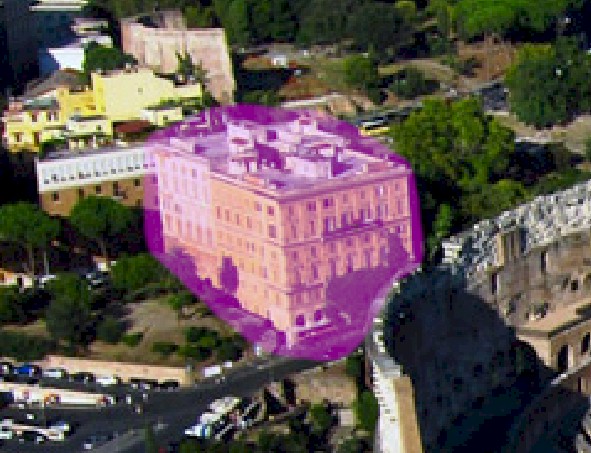
Click and drag to color over the building to select it, being sure to include some of the area
surrounding the building as well...
When you release the mouse button, Photoshop will process the removal and
you will see the Progress window...
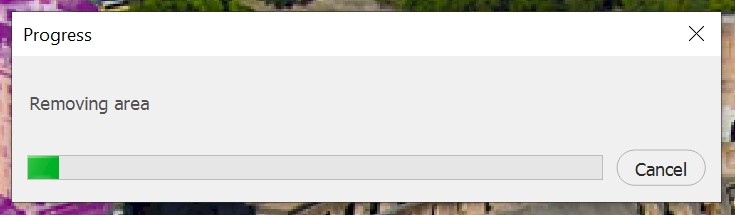
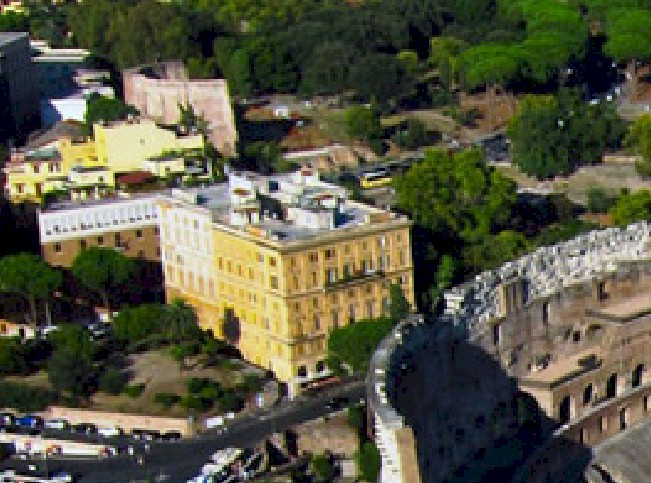
When Photoshop finishes processing, the building will be gone...
Note that the more complicated the background area around your selection,
the longer it will take Photoshop to process the removal
Keep in mind that your final result may be slightly different from mine
(because you will have selected an area slightly different from my selection),
but you should see something close...
| From this... |
To this... |
 |
|
Basically what has happened here is the machine learning within Photoshop was
not only able to identify that we wanted to remove a building, but noticed the
trees around the yellow building and the additional structures behind it and
developed objects to fill in the spot. However, you may notice that what
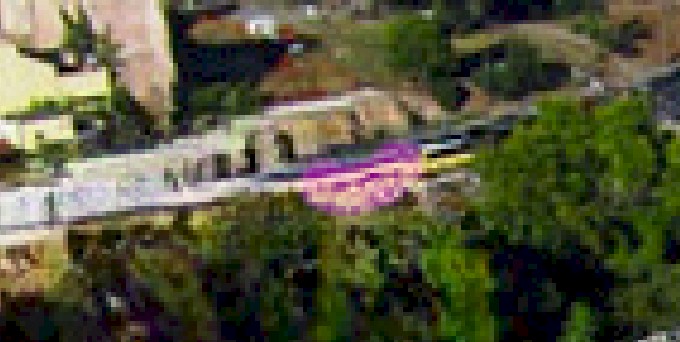
happened was not perfect. For example, look closely at this part of the image...
Photoshop probably did not do a very good job on the rocks or on the area directly
behind the yellow car. For me, Photoshop just kinda extended the yellow cars body (keep in
mind that it may or may not have done this to you depending on your selection). As it turns
out, one of the really cool thing about the Remove Tool is that if things
happened that we are not really happy with, we can simply reapply the tool and
get different results.
-
Press the left bracket (
[
) on the keyboard twice to decrease the brush size to 10...
 Color over any area that you are unhappy with - in my image, I'm going to
work with the newly created area behind the yellow car...
Color over any area that you are unhappy with - in my image, I'm going to
work with the newly created area behind the yellow car...
Photoshop will replace your selection with something different...
 Continue using the Remove Tool on the area until you have something that
looks nice - this is what my final result looks like...
Continue using the Remove Tool on the area until you have something that
looks nice - this is what my final result looks like...
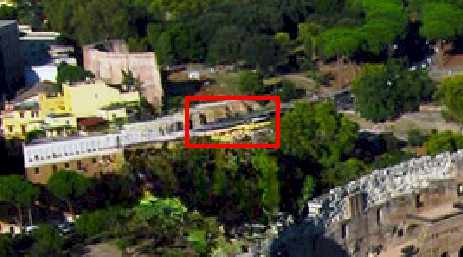
I'm not happy with the way the long white
building on the left flows into the rock formation, but it will be difficult to
separate the two using the Remove Tool because Photoshop will continue to use
the objects on each side to identify what needs to be created to fill in the
spot. There is an easer way to make small, quick fixes like this that we will
explore with Method 9 two steps from now.
Next, let's take a look at removing some objects near lines, shadows, and
areas we want to keep.
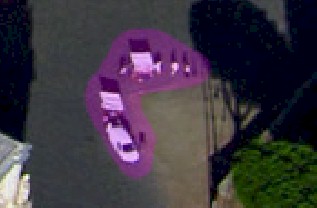
- On the right side of the image, locate the two spots
indicated below...
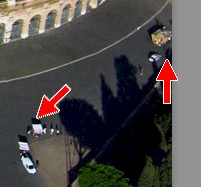
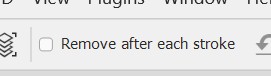
We are going to remove these two groups of vehicles and people at the same time. Right
now, the Remove Tool is set to process changes each time we release the mouse
button because we currently have the Remove after each stroke option activated,
as indicated on the Remove Tool options bar...

We need to deactivate this so that we can select two non-adjacent areas.
-
On the Remove Tool options bar, click the Remove after each stroke checkbox
to remove the check and turn off that option...
-
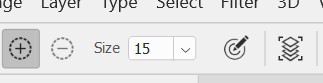
Set the size of the brush to 15...
-
Make sure Add to brushed area is selected (the icon with the plus surrounded
by a circle in the above image) - this will allow us to paint over two
non-adjacent areas
-
Paint over the left set
of vehicles and people, being sure to include
some of the area surrounding the vehicles as well...
-
Paint over the set of vehicles and people on the
right...
Be sure to include not only the vehicles but the shadows as well
Note that if you paint over an area that you do not want to include, you can
click the Subtract from brushed area icon...

and paint over that area to remove it from the selection.
-
When you have two selections you like, click the Apply to current strokes
checkbox...

Photoshop will remove the selected items...
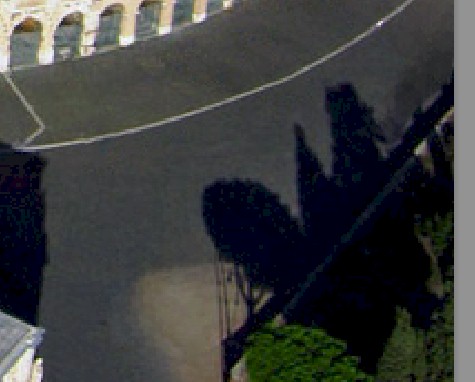
Pay particular attention to the vehicles from the left selection area that
were parked alongside the dirt. Notice that not only did Photoshop successfully
recognize that the vehicles were parked on asphalt, but it identified the dirt
and kept the shape of it intact...
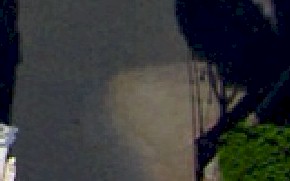
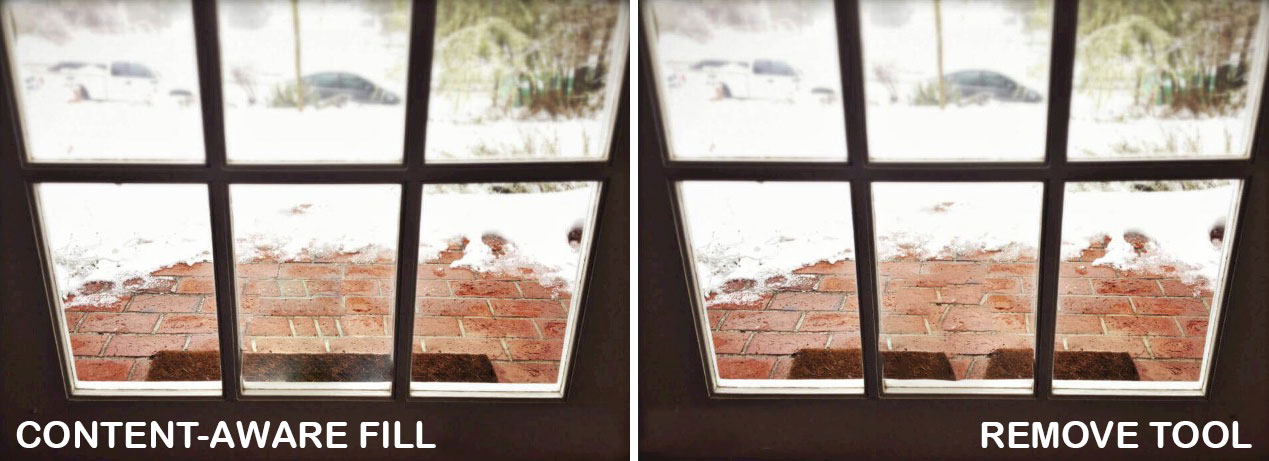
So how does the Remove Tool compare to the Content-Aware Fill tool? The image
below is the same area we just worked with, except I used the Content-Aware Fill
tool...
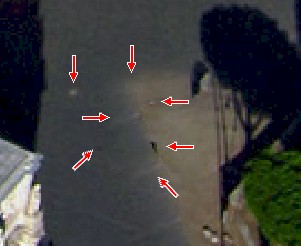
Notice that are many more blemishes, areas of distortion, and errors (the red
arrows) in the
end result that will have to be fixed using some other removal method. Also
notice that the dirt area has been misshapen into a point instead of a nice
curve. Clearly, the Remove Tool works better.
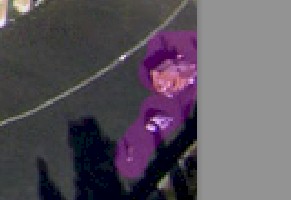
You may be wondering at this point what kind of job the Remove Tool would do
on an image with a complicated background such as our junkyard image...
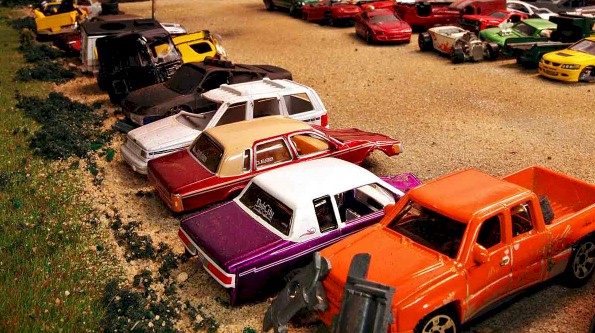
To test what we get in this instance, I made two different selections of the
dark red car with tan roof...
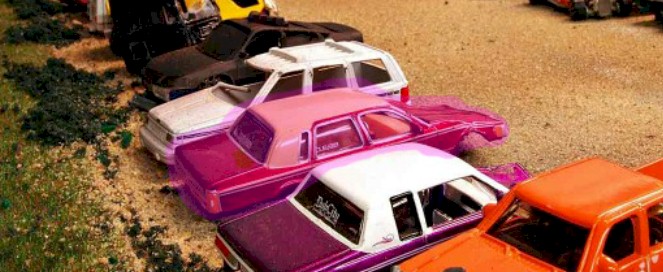
and let Photoshop's Remove Tool fill in the space. This is what Photoshop
returned...
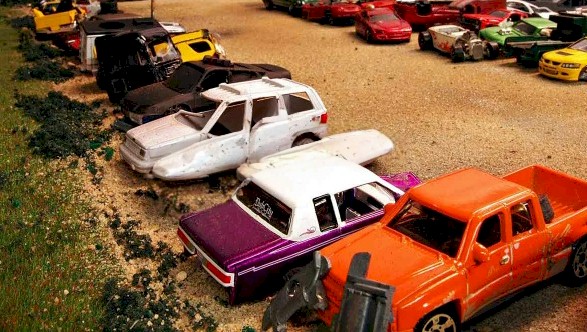
Note that in the first image on the left above that it kinda looks like
Photoshop thought the white vehicle was a boat or a surfboard. In the second
image above right, it is unclear where Photoshop got the information for the
image it created. Remember that the difference between the two images comes
entirely from the differences between the two selections that I made.
On this is very clear - if you were sitting there thinking that the Remove Tool can do everything and
you'll just use that all of the time, as you can see that's not a good idea. It
didn't do a very good job here. We can use some of the other removal
methods to clean this image up and eventually get what we want, but this means
the possibility of going outside Photoshop's tools and using additional images
to solve our problems (for example, for this image we would need to find an
image that shows the side of a car similar to the white car that we could use as
source material and then fill in the gravel using other parts of this image).
While
the Remove Tool does an amazing job, it obviously has
some issues. Here are a few things to keep in mind while using the Remove Tool:
-
As with the Content-Aware Tool, Photoshop has a problem with images that have
lots of different objects and details surrounding the object you want to remove.
Objects that the machine learning can identify and recreate will work fine,
but when you are dealing with something specific, like having to recreate the side of
a specific model of car, the AI is unable to be that precise (for now).
-
The
larger the object being removed the more likely Photoshop is to create
unnecessary extra material.
-
Complicated patterns and lines may be distorted
and not line up correctly. This is actually a common problem for all of Photoshop's
tools that automatically remove things. If we compare the result of using
Content-Aware Fill and the Remove Tool on the cat image,...
you can see that the Remove Tool did about the same as Content-Aware Fill.
-
The
selection that you paint with the Remove Tool is important. Even minor
changes to the
starting selection will result in a different outcome. You need to be sure
to include some of the background around what you want to remove.
-
Even
if the end results are not perfect, using the Remove Tool can be a quick and
easy first step. You can then clean up the image using any of the
other tools we have covered.
-
It is
not uncommon for there to be additional clean-up after using the Remove Tool, especially if the background is 'busy', so don't be surprised.
Let's save
our work up to this point.
-
Save your image
Our next tool, Generative Fill, not only allows us to remove objects, but can
generate new objects to replace them.